Soak the kit in cold water for 2-4 hours, then drain excess. Place in a humid, indirect light area. Spray water daily to maintain humidity. Harvest mushrooms when caps uncurl and lighten. Follow included instructions for optimal results and repeated growth cycles.
Welcome to the Back to the Roots Mushroom Growing Kit, a convenient and fun way to grow your own mushrooms at home. This kit is designed to make mushroom cultivation accessible to everyone, regardless of experience level. Inside the box, you’ll find everything you need to start growing, including a pre-colonized substrate, a growing bag, and detailed instructions. The kit is perfect for beginners, as it simplifies the process and ensures a successful harvest;
The kit works by providing a nutrient-rich environment for mushroom spores to grow. The substrate is already inoculated, meaning the hard work of colonization is done for you. Simply follow the step-by-step instructions to create the right conditions for your mushrooms to thrive. The kit is versatile and can be used to grow a variety of mushroom species, depending on the type you’ve purchased.
With proper care, your kit can produce multiple harvests, giving you a bountiful supply of fresh, homegrown mushrooms. The process is both educational and rewarding, making it a great activity for families, gardening enthusiasts, or anyone curious about mycology. By following the guidelines provided, you’ll be enjoying your own delicious mushrooms in no time. Let’s get started on your mushroom-growing journey!
Preparation and Setup of the Mushroom Kit
Preparing your Back to the Roots Mushroom Kit is a straightforward process that sets the stage for successful growth. Begin by carefully opening the box and reviewing the contents. Inside, you’ll find the grow kit, a bag of dry peat moss (casing), and detailed instructions, either printed or accessible via a QR code. Take a moment to familiarize yourself with each component and the steps outlined in the guide.
Next, locate a clean, flat surface for setup. Open the grow kit by removing the lid and pour water over the substrate until the container is fully saturated. Replace the lid and allow the kit to soak for 9–12 hours. This step ensures the substrate is properly hydrated, creating an ideal environment for mushroom growth.
While soaking, prepare the growing area. Choose a spot with consistent humidity and indirect light, such as a kitchen counter or laundry room. Avoid direct sunlight, as it can dry out the substrate. Once the soaking period is complete, drain any excess water and proceed to the next steps. Proper preparation and setup are crucial for a healthy and productive mushroom crop.
Soaking the Mushroom Kit: Step-by-Step Guide
Soaking your Back to the Roots Mushroom Kit is the first crucial step in initiating the growth process. Begin by carefully removing the lid from the grow kit. Fill the container with cold water until it is completely submerged, ensuring the substrate is fully saturated. Replace the lid and allow the kit to soak for 9–12 hours. This step rehydrates the substrate and prepares it for optimal mushroom growth.
After soaking, drain any excess water by gently tilting the container; Avoid squeezing the substrate, as this could damage the mycelium. Once drained, use a clean object to poke small holes in the bottom of the container for proper drainage and aeration, which are essential for healthy growth.
Finally, place the soaked kit in a humid, indirect light environment, such as a plastic bag or under a damp cloth, to maintain consistent moisture. Ensure the area is clean and free from drafts to prevent contamination. This step-by-step process ensures your kit is properly prepared for the next stages of mushroom cultivation.
Creating the Optimal Environment for Mushroom Growth
Creating the ideal environment for your Back to the Roots Mushroom Kit is essential for successful growth. Place the soaked kit in a location with consistent humidity and indirect light, such as a kitchen counter or pantry. Avoid direct sunlight, as it can dry out the substrate and inhibit growth.
Maintain a temperature range of 55–65°F (13–18°C), which is optimal for mushroom development. Ensure the area is draft-free to prevent moisture loss and contamination. Cover the kit with a damp cloth or place it inside a sealed plastic bag to retain humidity, misting the cloth or bag with water daily if necessary.

Avoid placing the kit near heating vents, radiators, or extreme cold sources. Cleanliness is crucial, so keep the surrounding area sterile to minimize the risk of mold or pests. By providing these conditions, you create a conducive environment for your mushrooms to thrive and produce a bountiful harvest.
Maintaining Humidity and Monitoring Progress
Maintaining Humidity and Monitoring Progress
Maintaining consistent humidity is crucial for healthy mushroom growth. Once your kit is set up, cover it with a damp cloth or place it inside a sealed plastic bag to retain moisture. Mist the cloth or bag with water daily to ensure the environment remains humid. Avoid over-saturation, as this can lead to mold growth.
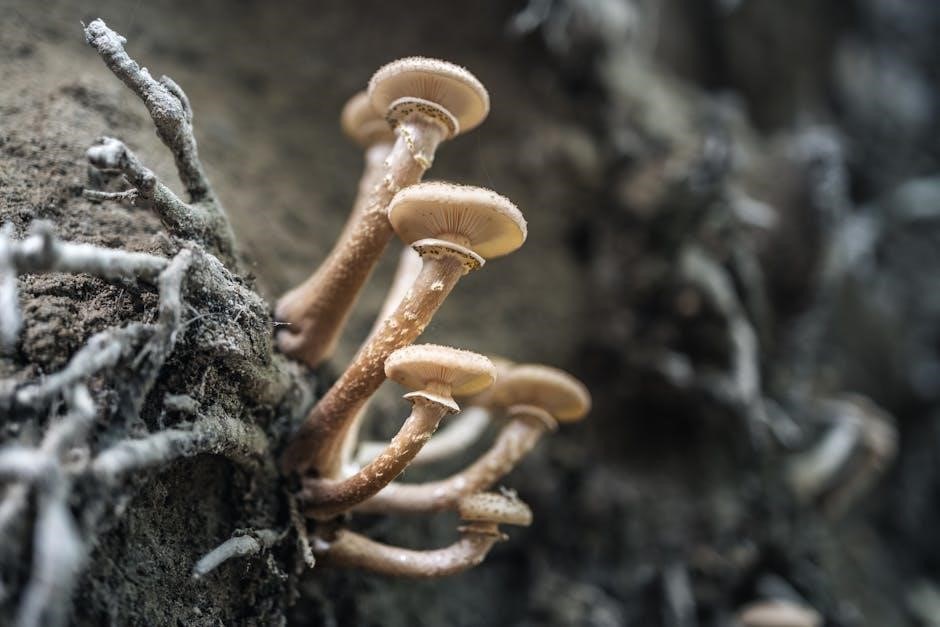
Monitor your kit daily for signs of progress. Within 1–2 weeks, you should notice small white pins emerging, which will develop into full-grown mushrooms. Ensure good airflow by opening the bag slightly or adjusting the cloth to prevent stagnation. Maintain indirect light and consistent temperatures between 55–65°F (13–18°C) for optimal growth.
If you notice the substrate drying out, increase the frequency of misting. However, avoid direct sunlight, as it can dry out the kit. Keep the area clean to prevent contamination. By carefully monitoring humidity and maintaining the right conditions, you’ll be on track for a successful harvest within 2–3 weeks. Stay observant and adjust as needed to support healthy mushroom development.
Harvesting Mushrooms: When and How
Mushrooms are ready to harvest when their caps fully open and the edges begin to uncurl. For most varieties, this occurs within 1–2 weeks after the first pins appear. Gently grasp the mushroom at the base and twist or pull it to remove it cleanly from the substrate. Avoid damaging the mycelium or leaving stems behind, as this can reduce future yields.

For optimal flavor and texture, harvest when the caps are fully open but before they start to dry out. If you notice the caps beginning to flatten or the gills exposed, it’s time to act quickly. Harvesting at the right moment ensures a better taste and prevents the mushrooms from over-maturing, which can reduce their quality.
After harvesting, inspect the substrate for any remaining mushrooms or new growth. Clean the area with a damp cloth to remove debris and prevent contamination. If properly maintained, your kit may produce multiple flushes, with new mushrooms appearing within 7–10 days of the first harvest. Repeat the process until the kit no longer produces, typically after 2–3 flushes. Store harvested mushrooms in a cool, dry place to preserve freshness before cooking or refrigerating.
Troubleshooting Common Issues
If your mushrooms are not growing as expected, check for common issues like contamination or insufficient humidity. Contamination appears as mold or discoloration on the substrate. If spotted, immediately remove the affected area with clean tools. Ensure the kit is kept in a clean environment and wash hands before handling.

If growth is slow, verify that the kit is receiving adequate humidity and indirect light. Avoid direct sunlight, as it can dry out the substrate. Over-watering or under-watering are also common mistakes—ensure the substrate remains damp but not soggy. If mushrooms are wilting, increase the frequency of misting.

Another issue is premature harvesting, which can reduce yields. Wait until caps are fully open and edges begin to curl. If no growth occurs after soaking and setup, check the expiration date of the kit or contact the supplier for assistance. Maintain consistent temperatures between 55–70°F (13–21°C) for optimal results. With proper care and attention, most issues can be resolved, ensuring a successful harvest.
Post-Harvest Care and Reusing the Kit
After harvesting, allow the kit to rest for 1-2 weeks to recover. Keep it in a humid environment, misting lightly every few days to maintain moisture. Some kits can produce multiple flushes of mushrooms, so monitor for new growth during this period.
To encourage a second harvest, ensure the substrate remains damp but not waterlogged. If no new mushrooms appear after 2-3 weeks, the kit may be exhausted. At this point, carefully remove the substrate from the container and dispose of it responsibly, such as composting it if possible.

Clean the container thoroughly with soap and water for future use. Reusing the kit depends on the type and condition of the substrate. Some kits are designed for a single use, while others can be refreshed with additional substrate or spores. Follow the supplier’s instructions for any reuse procedures.
Proper post-harvest care extends the life of your kit and ensures a healthy environment for future growth; Store unused kits in a cool, dry place until ready to use. Always follow safety guidelines when handling the substrate and mushrooms to avoid contamination or spoilage.