
Safety Instructions for GE Self-Cleaning Oven
Always read the manual before using the self-clean feature. Avoid using commercial cleaners and ensure proper ventilation to minimize carbon monoxide risks. Never leave the oven unattended during cleaning.
1.1. Important Safety Precautions
- Always read the entire manual before using the self-cleaning feature to ensure safe operation.
- Avoid using commercial oven cleaners, as they can damage the self-cleaning surfaces.
- Keep the oven unattended during the cleaning cycle, as high temperatures can cause burns.
- Ensure proper ventilation to prevent carbon monoxide buildup, which can be hazardous to health.
- Never use the self-cleaning feature for models not specifically designed for it, as this can lead to malfunctions or fires.
- Follow all safety guidelines to minimize risks and ensure optimal performance of your GE self-cleaning oven.
1.2. Warning: Fire and Carbon Monoxide Risks
The self-cleaning feature operates at extreme temperatures, posing fire hazards if misused. Carbon monoxide may be released during the cycle due to insulation emissions. Ensure proper ventilation by opening windows and doors to prevent CO buildup. Never use the oven for purposes other than self-cleaning during this mode. Overheating can occur if non-cooking items are left inside. Always monitor the oven during operation and follow ventilation guidelines to avoid risks.
1.3. Proper Ventilation During Self-Cleaning
Ensure adequate ventilation during self-cleaning to prevent carbon monoxide buildup. Open windows and doors to allow fresh air circulation. Use exhaust fans if available to vent fumes outside. Avoid operating the oven in a completely closed space, as high temperatures and emissions can pose health risks. Proper ventilation is crucial to minimize exposure to harmful gases and ensure safe operation. Always follow ventilation guidelines provided in the manual to maintain a safe cooking environment during the self-cleaning cycle.
Preparing Your Oven for Self-Cleaning
Remove racks and accessories before starting the cycle. Clean parts listed in the manual. Ensure the oven is empty for effective high-temperature cleaning.
2.1. Removing Oven Racks and Accessories
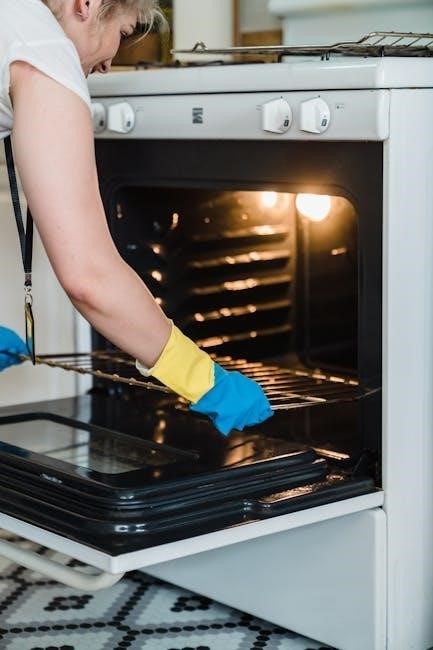
Before initiating the self-cleaning cycle, remove all oven racks and accessories to prevent warping or damage from high temperatures. Ensure the oven is completely empty.
Refer to the owner’s manual for specific parts that may need removal. Clean these items separately, avoiding commercial cleaners that could damage finishes or release harmful fumes.
2.2; Cleaning Parts Listed in the Owner’s Manual
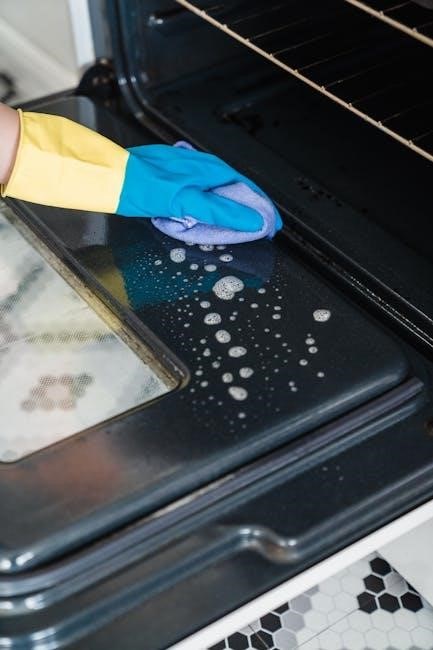
Clean only parts listed in the owner’s manual to avoid damage. Use mild soap and water for racks, pans, and utensils. Avoid abrasive cleaners or scourers that can scratch surfaces. For tough residue, soak parts in warm soapy water before scrubbing. Do not use commercial oven cleaners, as they can release harmful fumes or damage finishes. Some models may have porcelain-coated surfaces that require gentle cleaning. Dry all parts thoroughly before reinstalling to prevent rust or water spots.
Operating the Self-Cleaning Feature
Activate self-cleaning mode by following the manual’s instructions. The oven reaches high temperatures to burn food residue. Ensure the oven is empty and well-ventilated during operation.
3.1. Setting the Self-Clean Mode
To activate the self-cleaning feature, select the mode on the control panel and choose the desired cleaning duration. Ensure the oven is empty and racks are removed. Close the door securely and confirm the settings. The oven will lock automatically during the cycle. Avoid opening the door until it cools down. Proper ventilation is essential to prevent carbon monoxide buildup. For remote operation, use the WiFi Connect feature as outlined in the manual. Always follow the instructions carefully for safe and effective cleaning.
3.2. Understanding High-Temperature Cleaning
During self-cleaning, the oven reaches extreme temperatures to burn food residue to ash. This process requires the door to remain locked for safety. Ensure the oven is empty and racks are removed. Proper ventilation is crucial to prevent carbon monoxide buildup. The cleaning cycle lasts several hours, depending on soil level. Avoid interrupting the process. Let the oven cool before wiping away ash. Always follow manual instructions to ensure safe and effective high-temperature cleaning. This method eliminates the need for harsh chemicals, making it efficient and eco-friendly.

Maintenance and Care After Self-Cleaning
After the cycle, let the oven cool completely. Wipe down surfaces with a damp cloth to remove ash. Avoid using abrasive cleaners or commercial products, as they can damage the finish. Regularly cleaning ensures optimal performance and prevents food residue buildup. Refer to the owner’s manual for specific care instructions tailored to your GE self-cleaning oven model.
4.1. Wipe Down Surfaces After Cooling
After the self-cleaning cycle, allow the oven to cool completely before wiping down surfaces. Use a damp cloth to remove ash and residue, as metal scrapers may scratch surfaces. Avoid using abrasive cleaners or commercial products, as they can damage the oven’s finish. Regular wiping prevents residue buildup and maintains the oven’s performance. Ensure all surfaces are clean and dry before the next use to avoid smoke during preheating. Refer to the owner’s manual for specific cleaning recommendations tailored to your GE model.
4.2. Avoid Using Commercial Oven Cleaners
Never use commercial oven cleaners on your GE self-cleaning oven, as they can damage the finish or leave harmful residues. The high-temperature cleaning process is designed to burn away food residue without chemicals. Using such cleaners may release toxic fumes during future baking. Instead, wipe down surfaces with a damp cloth after cooling. This maintains the oven’s condition and ensures safe operation. Always follow the owner’s manual for approved cleaning methods to preserve your appliance’s performance and longevity.

Smart Features and Remote Control
GE self-cleaning ovens offer WiFi Connect, enabling remote operation via smartphone. Refer to the manual’s WiFi Connect section for setup instructions to control your oven conveniently.
5.1. WiFi Connect for Remote Operation
GE ovens with WiFi Connect allow remote control via smartphone. Enable smart features by connecting your oven to your home network. Download the GE Appliances app, follow in-app instructions to link your oven, and enjoy scheduling clean cycles or monitoring progress remotely. Ensure your router and device are compatible for seamless operation. Refer to the manual for detailed setup steps and troubleshooting tips to maximize convenience and efficiency with this innovative feature.
Lock Controls for Safe Operation
Engage the lock controls to ensure safe operation, especially during self-cleaning. This feature prevents accidental start-ups and protects children from accessing the oven. Locking the controls also avoids unintended temperature changes. Activate the lock by following the manual’s instructions, typically involving a specific button sequence. The controls will remain locked until you unlock them, ensuring a secure and safe cooking environment. This feature is essential for households with children and for preventing operational errors during high-temperature cleaning cycles.
Post-Cleaning Instructions
Allow the oven to cool completely before wiping down surfaces. Dispose of food residue safely, as it turns to ash during cleaning. Ensure all parts are cool to avoid burns.
7.1. Allowing the Oven to Cool
After the self-cleaning cycle, let the oven cool completely before opening or cleaning. This prevents burns from extreme heat. The oven may remain locked until cooled to ensure safety. Avoid touching hot surfaces or components, as they retain heat for an extended period. Keeping children away during cooling is essential. Proper cooling ensures safe handling and prevents accidental injuries.
7.2. Disposing of Food Residue Safely
After the self-cleaning cycle, allow the oven to cool completely. Use a heat-resistant container or damp cloth to collect food residue, as it may be powdery. Avoid inhaling dust by keeping the area well-ventilated. Dispose of the residue in a sealed, biodegradable bag to prevent environmental contamination. Do not pour ash or residue down drains, as it may cause clogs. Always wash hands thoroughly after handling oven waste and clean tools used with soap and water.
Troubleshooting Common Issues
Common issues include malfunctions during self-cleaning or improper operation. Ensure proper ventilation to avoid carbon monoxide risks. If issues arise, turn off the oven, disconnect power, and consult the manual for guidance. Avoid using abrasive cleaners, as they can damage surfaces. Always follow instructions carefully to prevent and resolve problems effectively.
8.1. Malfunctions During Self-Cleaning
If the self-cleaning feature malfunctions, immediately turn off the oven and disconnect the power supply. Ensure proper ventilation to prevent carbon monoxide buildup. Avoid using abrasive cleaners, as they can damage the oven’s surfaces. If the issue persists, consult the owner’s manual for troubleshooting guidance. For complex problems, contact a qualified technician. Regular maintenance and adhering to manual instructions can help minimize malfunctions and ensure safe, effective self-cleaning operation.
8.2. Resetting the Oven
To reset the oven during a malfunction, turn it off and unplug it from the power source. Wait 30 minutes to allow internal components to cool and reset. Plug the oven back in and test the self-cleaning feature. If issues persist, refer to the troubleshooting section in the manual. For unresolved problems, contact GE customer support or a certified technician for assistance. Regular resets can help maintain optimal performance and address minor software or operational glitches effectively.
Additional Tips for Effective Self-Cleaning
Regular maintenance ensures optimal performance. Avoid using abrasive cleaners and follow ventilation guidelines. Clean racks and accessories separately for better results and longevity of your oven.
9.1. Regular Maintenance for Optimal Performance
Regular cleaning and maintenance are essential for your GE self-cleaning oven’s optimal performance. Wipe down surfaces after each use to prevent food residue buildup. Avoid using abrasive cleaners or commercial products, as they can damage the oven’s finish. Clean racks and accessories separately and ensure they are dry before placing them back. Proper ventilation during self-cleaning cycles is crucial to minimize carbon monoxide risks. Always follow the owner’s manual guidelines for safe and effective maintenance.

Warranty and Customer Support
GE offers comprehensive warranty coverage and dedicated customer support. Register your appliance online for extended benefits and access to downloadable manuals, parts, and service scheduling.
10.1. Registering Your GE Appliance
Registering your GE appliance ensures warranty validation and access to exclusive support services. Visit the GE Appliances website, create an account, and enter your model and purchase details. This registration provides faster service scheduling, parts ordering, and personalized assistance. It also keeps you updated on product notifications and maintenance tips. Online registration is quick and secure, enhancing your ownership experience and ensuring optimal performance of your self-cleaning oven.
By following the guidelines in this manual, you can safely and effectively use your GE self-cleaning oven. Regular maintenance and proper operation ensure optimal performance. Always prioritize safety, ventilation, and manufacturer recommendations. The self-cleaning feature simplifies oven care, but careful adherence to instructions is crucial. For any issues, refer to troubleshooting sections or contact GE support. Enjoy efficient cooking and effortless cleaning with your GE appliance, knowing you’re backed by comprehensive warranty and customer service.